Macro photography allows you to shoot super close to your subjects and reveal a hidden world in microscopic detail. This popular, yet specialist genre, can deliver fantastic results, render subjects in incredible detail and produce abstract images too.
However, macro can be a tricky subject matter to master. Any minute vibrations in your camera, lens or even subject will be amplified and recorded as blur in your shots. Then there's the equipment, macro lenses, reversing rings, extension tubes, ring flashes, the list goes on... It can be difficult to know where to begin!
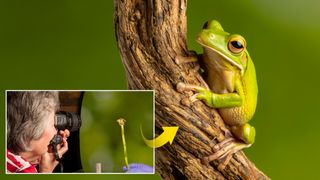
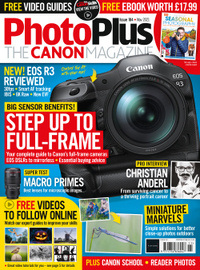
That's why this month we teamed up with a reader of PhotoPlus: The Canon Magazine, Sue Bryant, for a macro masterclass with Canon pro Andy Green at the fantastic CaptiveLight photography studio in Hampshire, UK.
• To shoot stunning close-up shots of your own, check out the best lenses for macro photography
Andy Green is a freelance photographer from Poole. He started out as a keen photographer 20 years ago, and now sells prints and runs 1-2-1 workshops. He’s also a photographer and animal handler at CaptiveLight, where we met up with him to photograph some amazing reptiles in their studio. His friendly, easy-going style makes his photo workshops full of fun and information.
1. Manual mode for studios

The CaptiveLight studio is set-up for macro photography with flash heads so Andy’s in complete control of the lighting. “This means we need to shoot in Manual mode, and can fix our aperture, shutter speed and ISO. I got Sue to set her R7 to Manual mode, with 1/160 sec for flash sync, f/18 for good depth of field, and ISO100 for the best image quality,” says Andy. “Once exposure settings were dialled in, Sue could leave them alone for the duration of the photoshoot, and I adjusted the lighting power and positions for different brightness. This enabled her to concentrate on composition.”
2. White Balance Kelvin

For consistent results, Andy showed Sue how to set her White balance manually to 5500 Kelvin. “We know when shooting with our Elinchrom studio lights, this WB setting produces the most accurate colour temperature for images. You could set the Flash WB preset, but that can mean your WB varies from approx 5500 to 6000K, depending on what the camera thinks is best. We’re shooting in Raw so you can always change the colour temperature of images later in Raw editing software, but it’s better to see correct colours on the LCD.”
3. Studio lights made easy

“Lights are our suns, but we’re in full control of their position, power and how diffused or direct the lights are!” laughs Andy. “Many amateurs are worried and get needlessly confused when it comes to studio lighting, but we soon teach them how simple they are to use, and how you can be in complete control of your lighting for better macro shots. They also freeze motion so you’ll get beautifully sharp macro shots. I showed Sue how you could angle lights to lighten or darken our subjects or backgrounds. This way you control which parts are lit or in shadow.”
4. Dedicated macro lens

“My macro lens of choice for small animal photography is my Canon RF 100mm F2.8L Macro IS USM lens which is super sharp and locks focus instantly when shooting on my Canon EOS R5,” says Andy. “This camera and lens combo also produces 8-stops of image stabilization and the lens enables you to shoot as close as 26cm from subjects for super close-ups.” Sue was using her R7, which is a crop sensor Canon with her trusty Canon EF 100mm f/2.8 USM macro lens with an EF-EOS R adapter – this gave her an effective focal length of 160mm.
5. Depth of field for close-ups

As your lens’s focal length increases, depth of field (DoF) decreases. DoF is also reduced if you use a wider aperture, plus DoF decreases even further the closer your focusing distance. This all means that DoF is incredibly shallow when you’re shooting small creatures close up with a telephoto macro lens. “If you were to use a wide aperture of f/2.8 on a 100mm macro lens, you only have a tiny region in shot that will appear sharp,” says Andy. “So instead I got Sue to set a narrower aperture of f/18 using her EF 100mm on her R7 for more DoF to ensure she captures more of the reptile’s eyes and heads sharp, and most of their bodies also in focus.”
6. Water sprayer

Andy’s secret weapon in the studio is a simple water sprayer. “The tropical reptiles like warm, humid conditions, like a rainforest habitat. Spraying the geckos and tree frogs not only keeps them comfortable and hydrated, but because they lack eyelids, they then lick their eyes to clean them – which can make for cool photos.”
7. Studio lights

Most of what we photograph is carried out indoors under studio lights so we’re not reliant on the weather,” says Andy. “We use Elinchrom ELC Pro-HD 500 flash heads. They’re well used, especially in workshops, and the lights are quick to recharge, consistent and tough. They’re also fast firing to freeze the fastest movements – the flash duration is between 1/3000 to 1/5000 of a second.
8. Autofocus advice

Modern mirrorless Canon EOS R system cameras have the latest in autofocus technology to help you get sharp shots of anything that moves. But you need to set up the AF correctly in the pink menus as Andy showed Sue on her R7: “You need to set AF operation to Servo so the autofocus can track more lively creatures. Switch on Subject tracking, set Subject to detect to Animals, and enable Eye Detection.”
9. Different backdrops

"We use Manfrotto Out Of Focus 1.2x1.5m backdrops in our studio such as Summer or Autumn Foliage for adding a realistic background for our creature close-ups,” says Andy. “We can easily hang them off the wall behind the wildlife when we’re shooting. They’re great as they’re already out of focus so even if they’re only a couple of metres from the creatures, the backdrop will still be blurred in shot.”
10. Shoot in Raw

Always shoot in Raw for the best image quality, but as the lighting creates such vibrant images, Andy finds his Raw images of wildlife studio need minimal editing. “I only need to tweak Shadows and Highlights in Adobe Camera Raw software, and boost the Vibrance, Clarity and Sharpening.”
If you're really into close-up photography, you'll want to check out the best lenses for macro. Andy uses a Canon EOS R5. To see his stunning portfolio check out his Instagram or to book a workshop visit his website.


